Safari configuration (optional)
You should have already integrated the Beams Web SDK before following this guide. If you have not yet integrated the Web SDK, first follow this guide.
∞ Prerequisites
-
Completion of the getting started guide for integrating the Web SDK
-
An Apple Developer account with access to a paid Apple Developer Program membership. You must have the ability to create an identifier
-
A Mac computer
-
An icon for your app, to be shown alongside your notifications. This should be a PNG at least 256 by 256 pixels in size
∞ Ensure you are using the correct SDK version
Check out the latest version under Web Client SDK.
∞ Create a certificate signing request (CSR)
In order to send push notifications to Safari, you need a certificate signed by Apple. These are generated using your Apple Developer account. Before you can request this certificate, you must generate a Certificate Signing Request. You will then submit this to Apple, who will generate a certificate based on the provided configuration.
- Open “Keychain Access” on your Mac
- In the top menu, select “Keychain Access” > “Certificate Assistant” > “Request a Certificate From a Certificate Authority…”

- A “Certificate Assistant” window will appear.

Fill in the following fields:- User Email Address
- Common Name
The common name can just be a helpful name for you to identify the key pair that will be generated and stored within keychain. E.g. “Safari Push Notifications”. - Select “Saved to disk”
Then click “Continue”
- Save the
CertificateSigningRequest.certSigningRequestfile somewhere so that it can be used in subsequent steps.

∞ Create a Website Push ID and submit your CSR
-
Open the Certificates, Identifiers & Profiles page of the Apple Developer site to begin registering a new identifier.
-
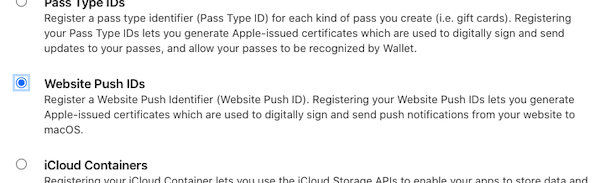
Select “Website Push IDs” then “Continue”.
-
The “Register a Website Push ID” page will open.

Enter a Description (this is just for you) and an Identifier.
The identifier must start withweb.and it is recommended to use a reverse-domain name style string.
Click “Continue”, then “Register”. -
Click on the identifier you just created, then click “Create Certificate”.
-
The “Create A New Certificate” page will open.

Upload theCertificateSigningRequest.certSigningRequestfile that you generated in the earlier step.
Click “Continue”. -
You will be taken to a page titled "Download Your Certificate”. Click “Download” and store the certificate on your computer.
Generate a p12 file
Now that you have your certificate from Apple, you need to combine it with the private key generated when you created your certificate signing request. This creates a p12 file, which is what you will then upload to Beams.
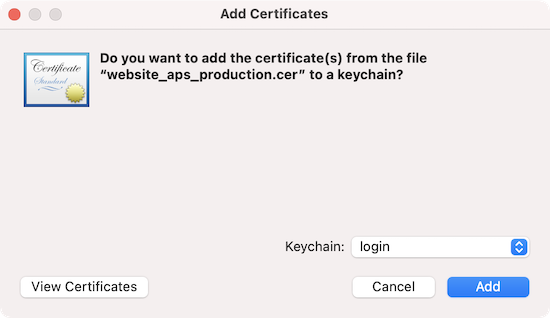
- Double click on the certificate you downloaded to open it in Keychain Access. You may be shown a prompt asking where to add the certificate. If so, you can add it to your login keychain. Sometimes the certificate will be added to your Keychain without showing a prompt. If you do not see a prompt then move on to the next step.
- In Keychain Access, select the “My Certificates” category. Search for "website push id” in the search box in the top right of the window. You should see a certificate named “Website Push ID:” followed by the identifier name you created in the previous step.
- Select the certificate then click “File” > “Export items…” in the top menu. Change the “File Format” to “Personal Information Exchange (.p12)” and save the file to disk.

You will be asked to set a password, which you should leave blank.
You may also be prompted to enter your system password in a separate window in order to export from Keychain Access.
You should now have a .p12 file on your machine.
The p12 file should be kept secure. It contains all the credentials that are needed to send notifications to your users.
∞ Configure your Beams instance in the dashboard
Now that you have your p12 file, you can configure Safari in the Beams dashboard. Select the instance that you would like to enable Safari notifications for, and navigate to the “Settings” page.
Scroll down to Safari Integration.

Fill in the following fields (all required):
∞ Upload .p12
Select the p12 file that you generated in the previous step. The p12 must not have a password/passphrase.
∞ Upload icon
Select an icon that will be displayed next to each notification. This should be a PNG at least 256 by 256 pixels in size. It will be automatically resized to all the sizes required by Safari.
Once a user allows notifications using the permissions dialog, it is not possible to change the icon for that user. Only new signups will receive the new icon. This is due to a Safari limitation rather than a limitation with Beams.
∞ Website Name
This is the name that appears in the notification heading and as the heading in Notification Center.
As with the icon, it isn’t possible to update the website name for users that have already accepted notifications. If you change your website name at a later date then only new users will see the new name. This is a limitation with Safari rather than Beams.
∞ Allowed Domains
This is a comma-separated list of domains on which you will use the Beams SDK. These should include the protocol (and port if necessary) but no path. E.g.http://localhost:8080, https://www.example.com. If a domain isn’t in this list then you won’t be able to show the permission dialog on that domain.
∞ Default URL
This must be a HTTPS URL
In other browsers, it’s possible to send notifications that do nothing when clicked. In Safari, all notifications must have a link to be opened when the notification is clicked. If you send a notification without providing a deep_link then the default URL will be opened when the notification is clicked.
Once you have filled out all these fields, click “Save changes”.
∞ Try it out
∞ Request permission
As with other browsers (such as Firefox), the notification permission dialog can only be triggered in response to a user action such as a button click.
You shouldn’t need to make any changes to your client code other than installing the2.0.0-beta release of the Beams Web SDK. Open your website in Safari and call start in the Web SDK. Remember, this must be done within an onclick handler. Safari will present a dialog box requesting permission to send notifications.

∞ Send a notification
Safari uses the web key of the publish payload therefore you can trigger notifications in the same way as you did in the Web SDK integration guide.

∞ Troubleshooting
∞ The notification permission dialog doesn’t show
- Ensure you are calling
startin response to a user event such as a button press. You should see an error in the browser console if this is the issue. - Ensure your Allowed Domains include the domain and port from which you are loading the page which is calling
start.
∞ Safari limitations
- Insights do not currently work in Safari. We are planning to add open rate support, but acknowledgements are not technically possible due to Safari limitations. This means you will not receive the corresponding
UserNotificationAcknowledgementandUserNotificationOpenwebhooks for Safari devices. Please bear in mind that you will still receive thePublishToUsersAttemptwebhook. - It is not possible to update the icon or website name for users that have already allowed notifications. If you change your website name or icon at a later date then only new users will receive the new name and icon. This is a limitation with Safari rather than Beams.
- You can’t send data or run JavaScript in response to receiving notifications as you can in other browsers. This is a limitation with Safari rather than Beams.
- Safari does not support Web Push Notifications on iOS or iPadOS devices. Safari only supports notifications on desktop devices. This is a limitation with Safari rather than Beams.
- Not all the publish payload keys have an effect in Safari. You can find out more in the publish payload format docs.
∞ Certificate expiration
The certificate issued to you by Apple will expire after one year. You should replace this certificate before it expires otherwise new users will not be able to sign up for notifications and you will not be able to send notifications to any users. You can find out more in the certificate expiration guide.
∞ Where next?
- Read the guide on publishing to a specific user to learn about securely publishing to individual users
- Web SDK reference docs
- Web publish format